Mastering Screenshots on Your Chromebook: A Comprehensive Guide
- 202
Chromebooks are popular because of their affordability and simplicity. They've been a lifesaver during the pandemic, helping students adapt to virtual learning. But are you making the most of your Chromebook? Did you know you can easily capture screenshots with just a few simple steps? Here's your step-by-step guide to becoming a Chromebook screenshot expert.
Method 1: Using Keyboard Shortcut
Chrome OS has a built-in keyboard shortcut for taking screenshots. It's quick, easy, and reliable.
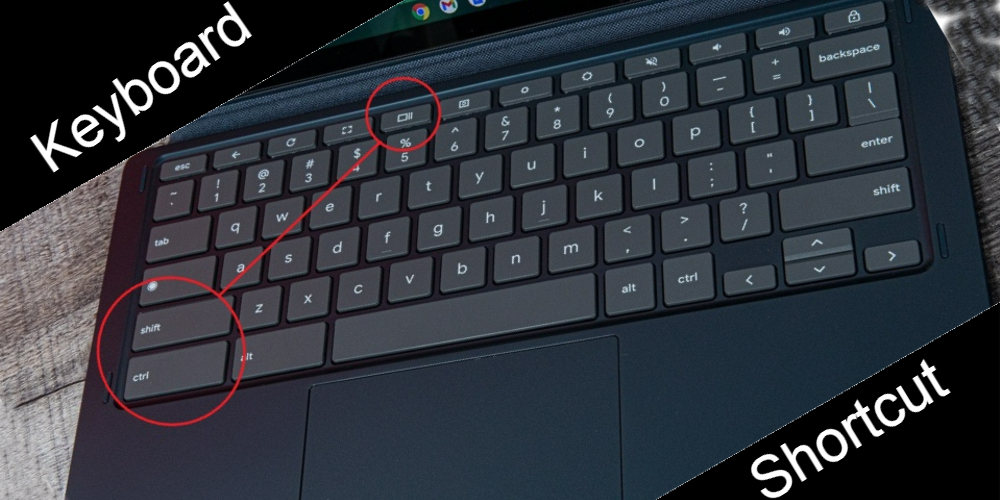
Step 1: Initiate the Screenshot Command
Press Shift + Ctrl + Show. The Show button is represented by a rectangle next to two vertical lines. If you're using an external keyboard that doesn't have a Show button, press Shift + Ctrl + F5 instead.
Step 2: Select Screenshot Option
A menu will appear at the bottom of the screen. Here, select 'Screenshot'.
Step 3: Choose the Type of Screenshot
You can opt for a full-screen screenshot, partial screenshot, or window screenshot, depending on your needs. Make your choice, and voila! Your screenshot is captured.
Method 2: Using the Screen Capture Tool in Quick Settings
In March 2021, Google introduced a screen capture tool in the Quick Settings menu on Chromebooks. Here's how to use it.
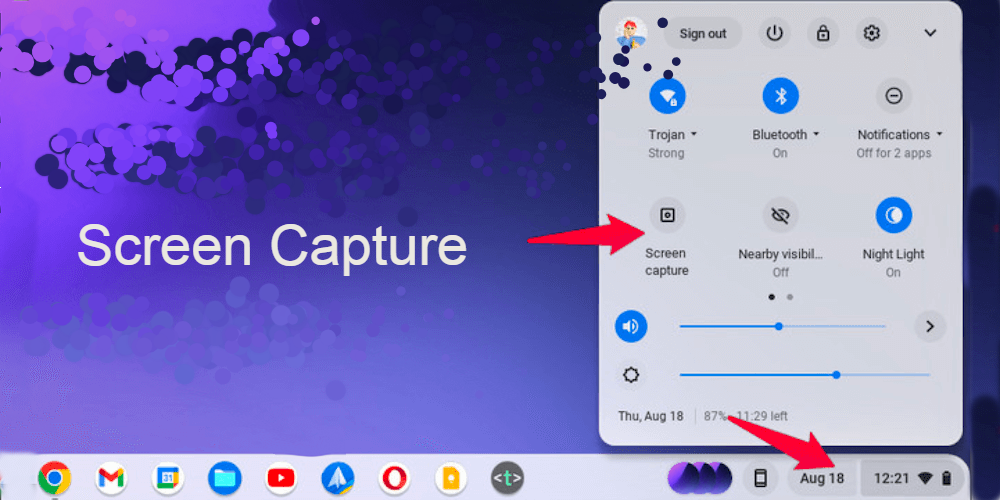
Step 1: Access Quick Settings
Start by opening Quick Settings, located on the bottom right of the screen.
Step 2: Select Screen Capture
Once in Quick Settings, find and select 'Screen Capture'.
Step 3: Prepare Your Screen
Make sure what you want to capture is correctly displayed on your screen.
Step 4: Choose Capture Options
Choose whether you want to snapshot your entire screen, a specific window, or a fraction of your screen. You also have the option to record either a portion or the entirety of your screen.
Step 5: Capture!
Click 'Capture'. Your screenshot is now taken!
Finding Your Screenshots
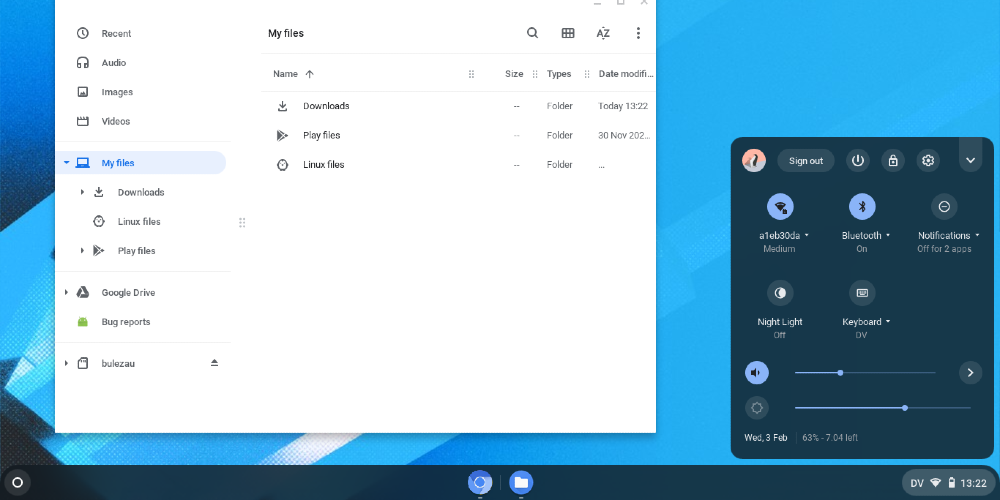
Intriguing about the whereabouts of your snapshots? These are seamlessly duplicated to your Clipboard and displayed in Tote. Tote, a function presented with Chrome OS 89, allows your crucial files to be readily accessible. Engage Tote from the Shelf to reach newly downloaded materials, screen snaps, and secured files.
You have the option of locating your screenshots within your Downloads folder. If you wish to modify the location for saving these screenshots in the future, you can press Shift + Ctrl + Show, navigate to Settings, and then choose Select Folder. By selecting the preferred storage location, all the forthcoming screenshots will be captured and stored in that selected directory.
Remember, Chromebooks have limited storage, so it's a good idea to back up your images to Google Drive, where you can access them from any device.
And there you go! An all-inclusive manual on capturing screenshots on a Chromebook. Enjoy your screenshotting journey!